
1 Requirements
Before you begin, make sure you are trying to install this plugin on WordPress multisite (WordPress Network) website. If you haven't configured WordPress as multisite (WordPress Network) yet, please visit Create A Network page and follow the instructions to do so.
2 Installation
This guide assumes that you already have WordPress Network (Multisite) installed on your local machine or remote server. In case you haven't done that yet, please read Installing WordPress and Create A Network guides first.
-
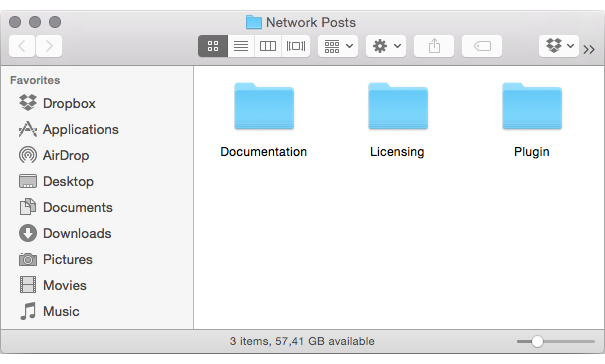
Extract (Unzip) ZIP File you have downloaded from CodeCanyon.
You should find the following folders: Documentation, Licensing, Plugin.
-
Upload Network Posts plugin.
- Login into your WordPress Network.
-
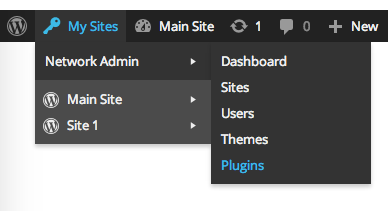
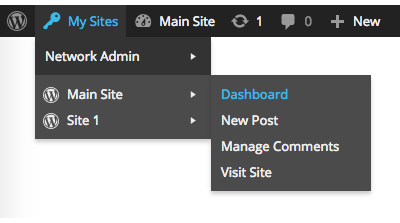
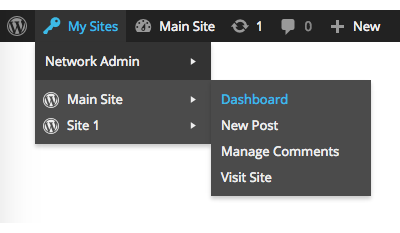
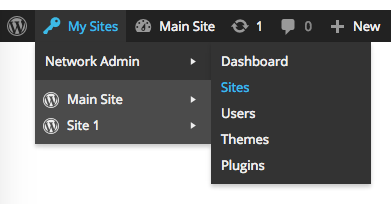
From top bar menu select My Sites -> Network Admin -> Plugins (see the illustration below).
-
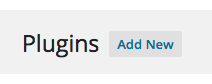
Click Add New
-
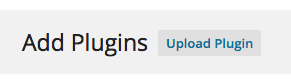
Click Upload Plugin
-
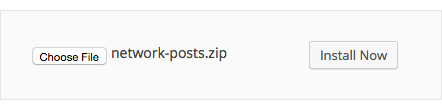
Locate where you extracted the file you have downloaded in step 1, select file network-posts.zip located in Plugin directory and click Install Now.
-
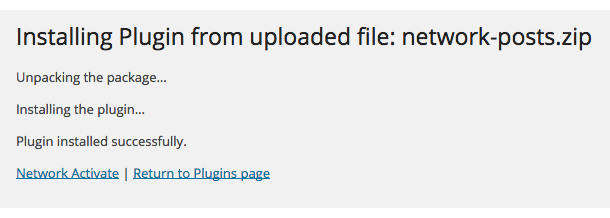
Click Network Activate when prompted to activate Network Posts plugin.
Activation Failed?
If you see message "Network Posts plugin is intended for WordPress multisite use only!" it's very likely you are trying to install plugin in non-multisite environment. Please, check requirements again, if problem persists send us message on Envato Market.

3 Settings and Caching
Once activated plugin will start caching all newly added or updated posts and those posts will be instantly available to be displayed on your Main Site using shortcode or widget. But what about the existing posts, you might ask? Most of multisites have hundreds if not thousands of posts and caching them might take significant amount of time so we introduced extra step to cache old entries manually. Before we start caching existing posts let's review plugin settings:
-
Open your main sites' dashboard. It's usually the second menu item and placed right after Network Admin option in My Sites drop down.
-
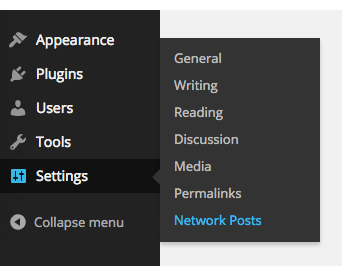
Navigate to Settings -> Network Posts.
-
Network Posts settings include the following configuration options:
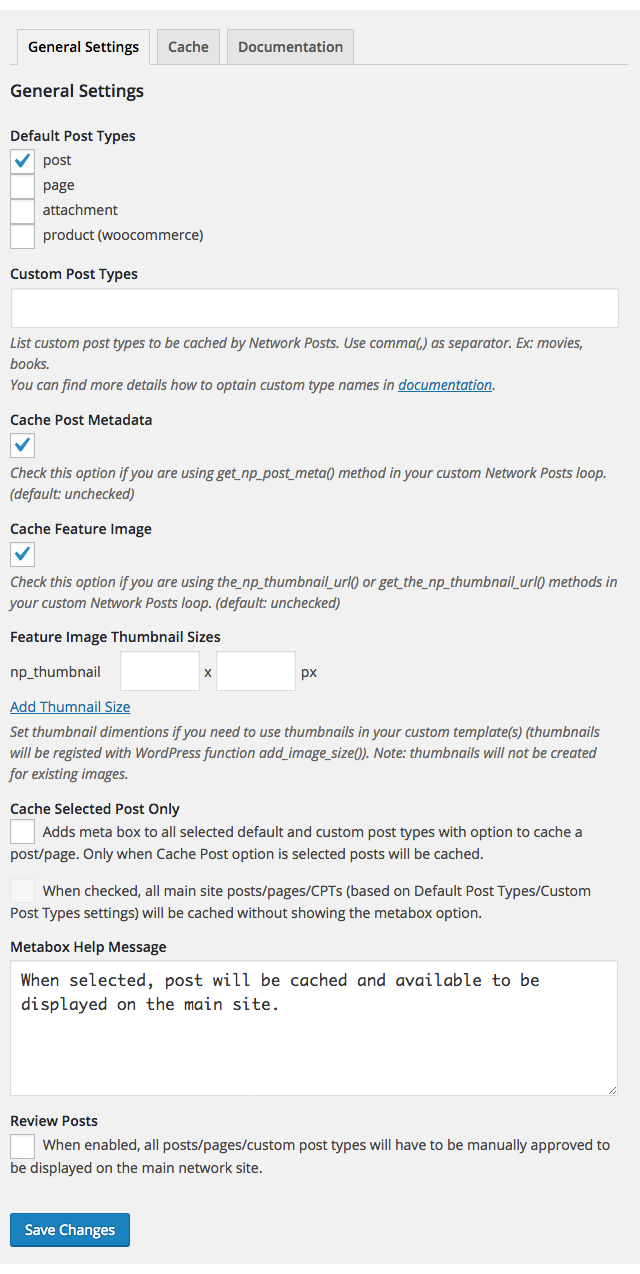
Here is details about each and every option available:
- Default Post Types Network Posts can cache not just WordPress post but also other common post types. Check page, attachment and/or product checkboxes to enable caching for these post types.
- Custom Post Types When caching default post types are not enough, it's possible to specify which custom post types should also be cached by Network Posts plugin. You can use Network Posts CPT to identify custom post types registered in each network blog.
- Cache Posts Metadata When checked, Network Posts plugin simply copies all existing post metadata (like last edited time, custom metabox data, etc.) into network posts caching table. You might want to check this option if you are willing to display that extra information you would normally display using get_post_meta() method in your template.
- Cache Feature Image If you are planing to display post thumbnails (featured images) when using widgets, shortcodes or custom page templates enable this option. Use the_np_thumbnail_url() or get_the_np_thumbnail_url() methods to retrieve featured image URL in your custom template/plugin code.
- Featured Image Thumbnail Sizes When featured image is used in custom page template, plugin or widget (don't forget to enable Cache Feature Image option) you might want to display custom size featured image and not rely on usually larger or smaller than needed default thumbnail size. When building custom template, you can use name on the left of input boxes as a parameter for the_np_thumbnail_url() or get_the_np_thumbnail_url() functions to retieve scaled image.
-
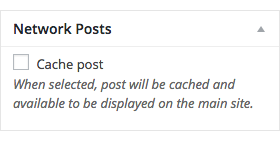
Cache Selected Post Only When selected a metabox will be added to page/post/CPT edit pages (based on Default Post Types / Custom Post Types settings) and will provide option to cache/skip caching for particular entry.
-
Metabox Help Message It's possible to customize metabox help message text. This will only be visible when Cache Selected Post Only option is selected.
- Review Posts When enabled, allows reviewing (accept, ignore) all posts, pages and custom post types before displaying them on the main network site. See Review Posts section for more details.
After you successfully update the settings proceed to the caching tab.
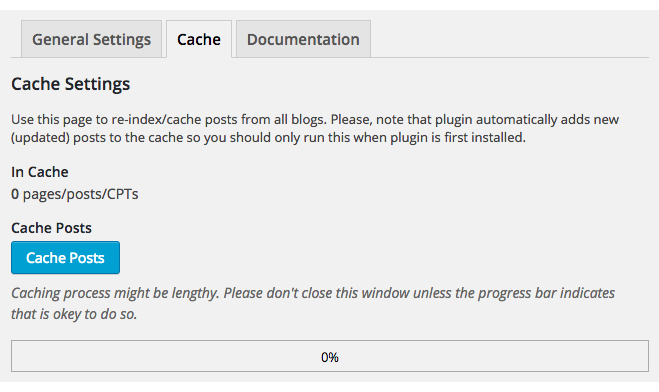
To cache exsiting posts from all multisite (network) sites click Cache Posts button. Please, be patient, depending on number of blogs and posts in each multisite blog this might take some time. Close this page/tab only when progress bar indicates that process if finished.
4 Widgets
At this point you should have already completed Installation, Settings and Cache instructions and you are ready to place your first widget on your main network site. This plugin comes with three custom widgets. To start with, pick one and follow the steps outlined.
- Network Blog Recent Posts widget allows you to display recent blog posts from any single blog on the network sorted in lastest-to-oldest order.
- Network Recent Posts widget displays recents posts from all network blogs sorted in lastest-to-oldest order.
- Network Posts Stats could be used to displays network posts statistics in sidebar or footer.
Network Blog Recent Posts
-
Open your main sites' dashboard. It's usually the second menu item and placed right after Network Admin option in My Sites drop down.
-
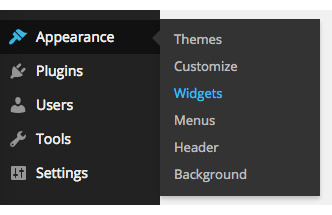
Open Appearance -> Widgets page.
-
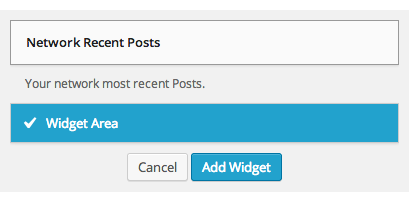
Find Network Blog Recent Posts widget in the list on the right. Pick widget area and click Add Widget button.

-
Locate the widget in the sidebar you just added it and make last look and feel modifications.
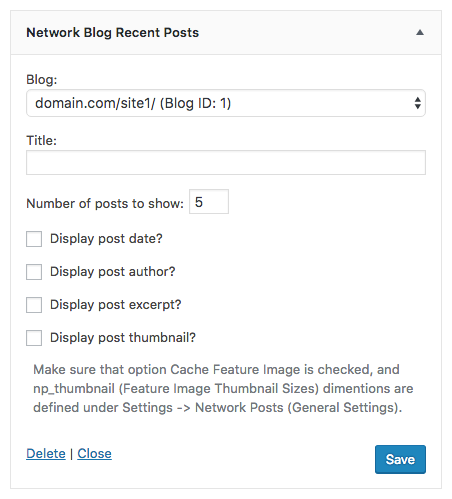
- Blog Pick the Blog you are willing to display recent posts from.
- Title Title that will be displayed above (in most of WordPress themes) the widget itself.
- Number of posts to show Setting defines number of posts to be displayed.
- Display post date? When enabled displays post publish date next to the post title.
- Display post author? When enabled displays post author.
- Display post excerpt? When enabled, post excerpt (when not available part post content) will be displayed.
- Display post thumbnail? Shows featured image when option is enabled and featured image is set.
Note:
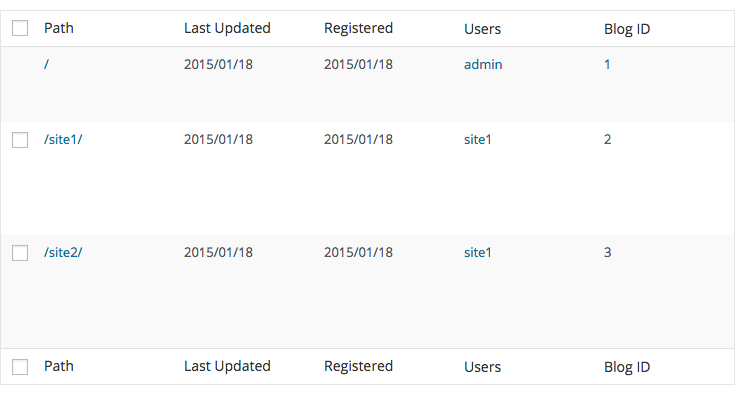
When your multisite has more than 50 sub-blogs, instead of blog drop down you will see Blog ID input box, see below:
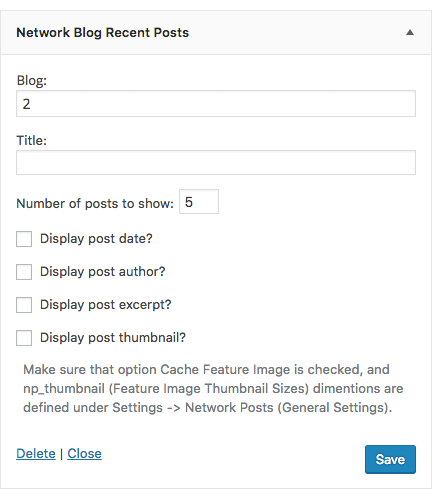
This was done so that sites with thousands of sub-blogs could be still use this widget without slowing down the network and the page.
Please follow these steps if you not aware where to find Blog ID (if needed):
-
Open My Sites -> Network Admin -> Sites page as shown below:
-
Find desired blog and locate its ID in Blog ID column (last column in the table).
-
Use that Blog ID when customizing widget.
Network Recent Posts Widget
-
Open your main sites' dashboard. It's usually the second menu item and placed right after Network Admin option in My Sites drop down.

-
Open Appearance -> Widgets page.

-
Find Network Recent Posts widget in the list on the right. Pick widget area and click Add Widget button.
-
Locate the widget in the sidebar you just added it and make last look and feel modifications.
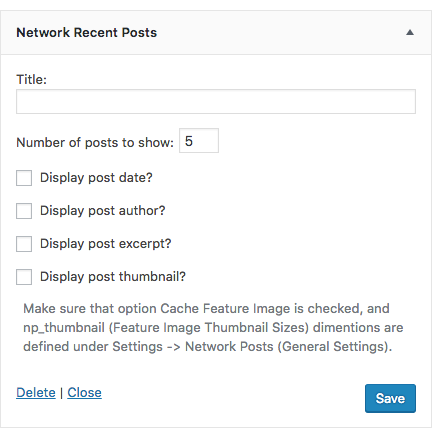
- Title Title that will be displayed above (in most of WordPress themes) the widget itself.
- Number of posts to show Setting defines number of posts to be displayed.
- Display post date? When enabled displays post publish date next to the post title.
- Display post author? When enabled displays post author.
- Display post excerpt? When enabled, post excerpt (when not available part post content) will be displayed.
- Display post thumbnail? Shows featured image when option is enabled and featured image is set.
Network Posts Stats
-
Open your main sites' dashboard. It's usually the second menu item and placed right after Network Admin option in My Sites drop down.
-
Open Appearance -> Widgets page.
-
Find Network Posts Stats widget in the list on the right. Pick widget area and click Add Widget button.
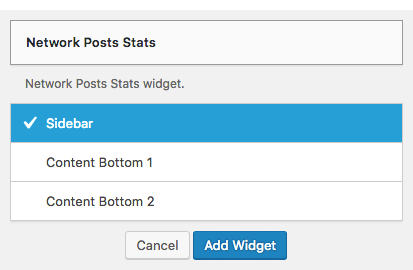
-
Locate the Network Posts Stats widget in the sidebar and make changes if needed.
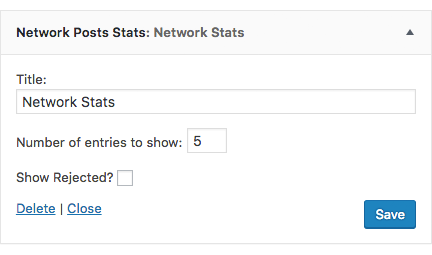
- Title title that will be displayed above (in most of WordPress themes) the widget itself.
- Number of entries to show limits number of sites to be listed.
- Show Rejected? enables to display number of rejected posts each site has. This feature is only useful if you're using Review process.
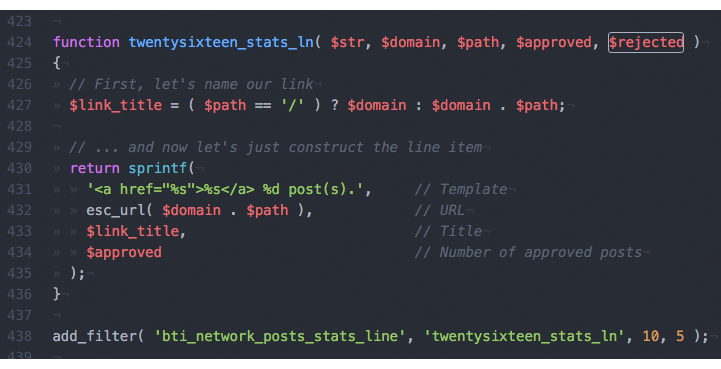
Note: You can use bti_network_posts_stats_line filter hook to change the way results are displayed (add your code to theme functions.php file), see example below.
5 Shortcode
Shortcode comes as an alternative option to Network Posts widgets and custom templates to display your network posts on your main site.
Here is few steps to get you started:
-
Navigate to your main sites' dashboard. It's usually the second menu item and placed right after Network Admin option in My Sites drop down.
- Open Pages -> Add New (or selecte existing page to edit).
-
Next to the Add Media button (above editor) you should see button Add Network Posts Grid.
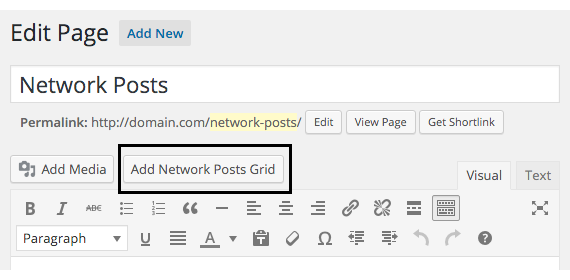
-
Click Add Network Posts Grid to see shortcode options. Pick/adjust desired options and then click button Insert.
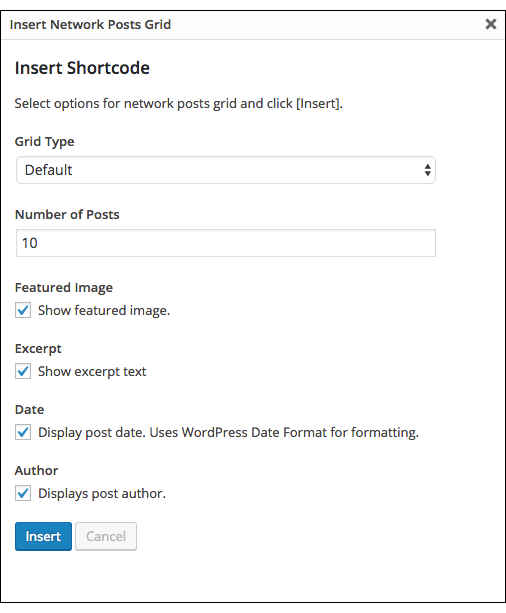
- Adjust other page options like template, permalink url, etc and click button Publish or Preview Changes to see the Network Post grid.
Note: Network Posts shortcode has five (5) optional parameter that are not included in insert shortcode dialog:
- post_type to be used as a filter to display custom post type grid. For example: [network_posts ... post_type="movies"/].
- blog_ids to be used as a filter to display content from specific network site(s). This argument accepts multiple blog ids separated by comma. Ex: [network_posts ... blog_ids="1"/]; [network_posts ... blog_ids="1,2,3"/].
- author to be used as a filter to display content from specific author(s). Accepts list of author ids separated by comma. Ex: [network_posts ... author="1"/]
- offset parameter should be used to offset the query and display results from 5th, 10th or any other position. Ex: [network_posts ... offset="5"/]
- category_name accepts post category slug(s). This allows displaying only posts from specific category or categories. Ex: [network_posts ... category_name="uncategorized"/]
6 Review Posts
Post review tool allows reviewing posts (pages, or custom post types) before displaying this on the main network site. Once enabled, only approved posts will be displayed when using widgets, shortcodes or custom templates.
As post review is optional feature, we need to enable it first:
-
Open your main sites' dashboard. It's usually the second menu item and placed right after Network Admin option in My Sites drop down.
-
Navigate to Settings -> Network Posts.
-
Locate option Review Posts, and check the checkbox, then click save.

Great! Review Posts tool is now enabled and you should be able to see Network Posts menu entry in WordPress admin dashboard menu bar.
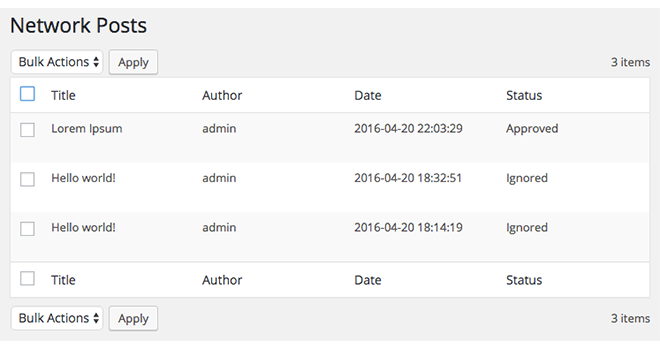
Use bulk or item actions to approve the posts you willing to display.
Note: Once post is updated, it will be relisted as pending for review.
7 JavaScript Files
This plugin uses single javascript file which is loaded only when Network Post settings page is opened.
- js/network-posts.js Generic script that handles Feature Image Thumbnail Sizes add/remove button fuctionality and caching tab implementation.
8 PHP Files
Here is plugin PHP code structure:
- network-posts.php Main plugin file. This file includes code for initialization checks and routines.
- includes/caching.php This file includes caching functionality for individual posts. Handles post add / update and trashing events. Note: this file does not hold the code for bulk caching. Bulk caching functionality is implemented in includes/settings.php file.
- includes/entry.php Helper class used to insert/update cached records.
- includes/grid.php Contains code for shortcode implementation for both wp-admin UI and front-end.
- includes/install.php This file handles initial plugin activation/installation. The only purpse of this file is to generate and insert custom table schema for Network Posts plugin into your WordPress database.
- includes/metabox.php Based on Network Posts plugin settings methods in this file will add additional metabox to selected default and custom post types allowing to select which post or pages should be cached (opt-in option).
- includes/query.php This file contains NP_Query, Network Posts loop code and public functions.
- includes/review.php Optional post review tool. Includes code to display the network posts cache table and handle bulk and item actions.
- includes/settings.php Network Posts plugin settings page implementation. This file also includes code for bulk post caching.
- includes/sites.php Contains code to add and display Blog ID column in Network Admin Sites page.
- libs/np-list-table.php A copy of standard wp-list-table.php (WP_List_Table class), to ensure plugin compatibility with future WordPress versions.
- tables/review.php Custom table implementation for network posts review tool.
- widgets/network-blog-recent-posts.php Contains code for Network Blog Recent Posts widget and its initialization.
- widgets/recent-posts.php Exclusively inludes only the code needed for Network Recent Posts widget and its initialization.
- widgets/stats-widget.php Network Posts statistics widget code/implementation.
If you intend to modify plugin, please keep in mind, that any official updates will overwrite all the changes made. Please, consider contacting us with your additional requirements/suggestions or bugs discovered while using this plugin.
9 Sources and Credits
Network Posts plugin depends on jQuery and jQuery-UI libraries (shipped with WordPress).
10 Appendix: Network Posts CPT (Plugin)
When it's not clear what custom post types are regstered or what slugs should be listed Network Posts Custom Post Type settings field one could use Network Posts CPT plugin (bundled with Network Posts) to identify that information.
Let's start with install process:
- Login into your WordPress Network.
-
From top bar menu select My Sites -> Network Admin -> Plugins (see the illustration below).

-
Click Add New;

-
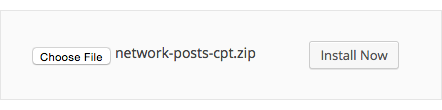
and then Upload Plugin

-
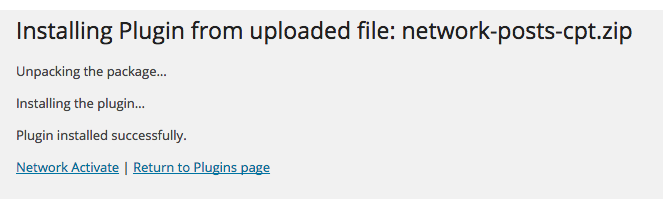
Locate network-posts-cpt.zip that came with Network Posts plugin (in Plugin directory) select to upload and click Install Now.
-
Click Network Activate when prompted to activate Network Posts CPT plugin.
Once Network Posts CPT plugin is installed open Settings -> Network Posts CPT page.
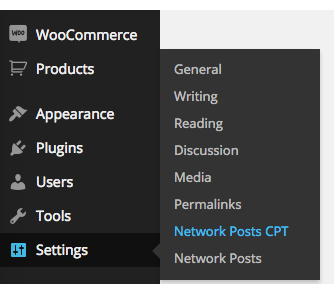
Depending on custom post types registered for particular network blog you should see result similarto the illustration below:
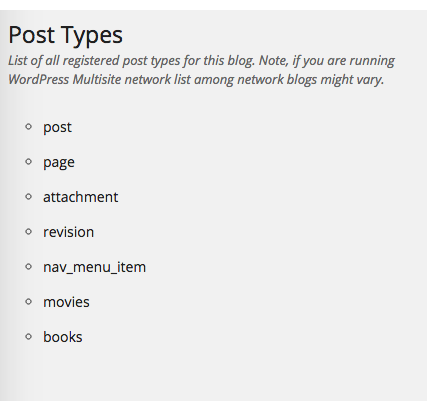
Note: Each network blog might have different post types registered, besides checking CPT registered on main site be sure to check individual blogs as well.
11 Appendix: Custom Page Template with NP_Query
Network Posts plugin includes not just the widget you can use in your main network site but also a simplified impementation of WP_Query - NP_Query (for cached Network Posts).
As this is an advanced topic, we assume that you are already familiar WordPress and web development in general. All core functionality described in this section is implemented in includes/query.php source file. At the end of this section you can find list of functions available insde NP_Query loop. You can use these functions inside your custom theme template (or plugin) to retreive post related information.
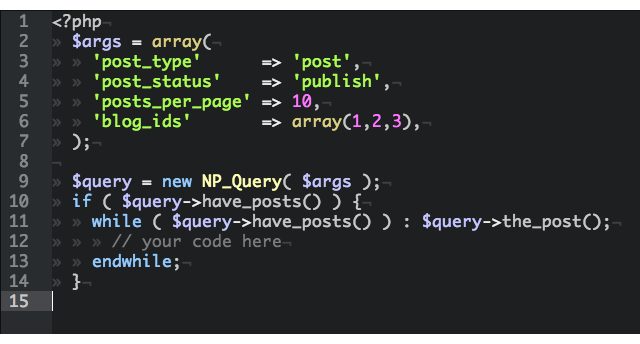
Illustration bellow shows how to implement simple custom page template to loop through latest NP_Query posts:
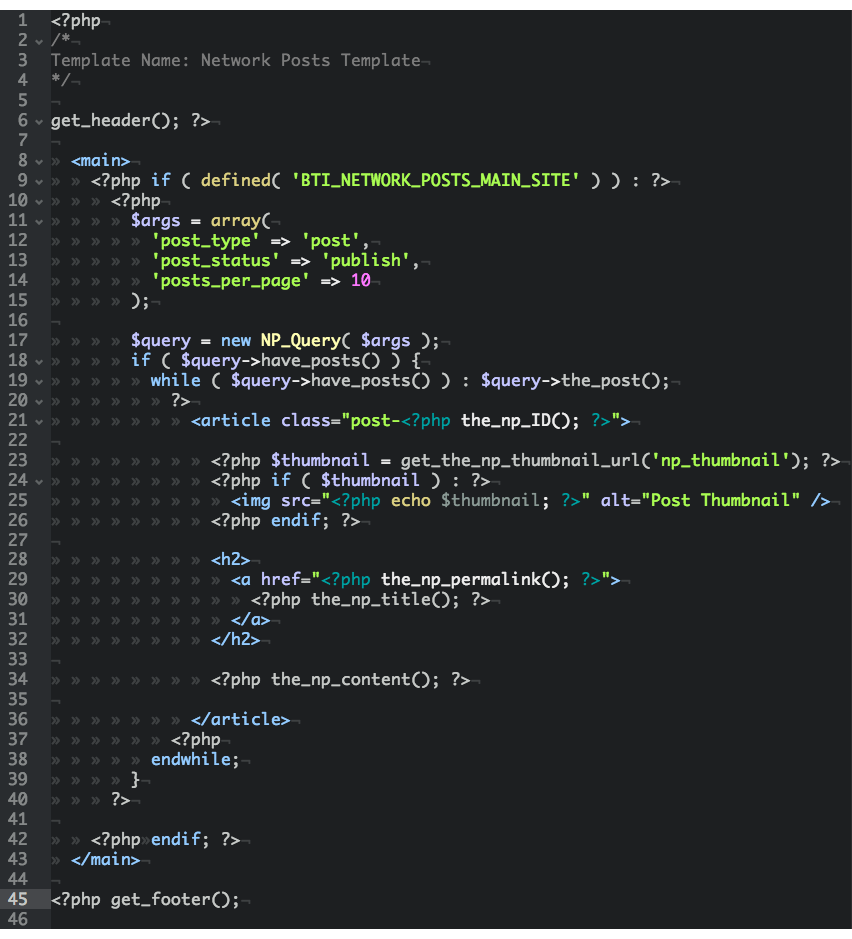
You can find the source code of the code above here. Now lets quickly discuss each section of the code line by line (or so).
- Line 9: Before running any NP queries we need to make sure that plugin is activated and all those functions are available. To do so we just need to check if BTI_NETWORK_POSTS_MAIN_SITE constant is defined.
- Lines 11-15: We define arguments array. Only posts_per_page line is actually important, it indicates how many posts to fetch from the database.
- Line 17: Like writing custom loop with WP_Query, using NP_Query we passing peviously defined arguments as parameters for to be initiated class.
- Lines 18-19: Like with custom WP_Query we check if posts were found and we start looping though them.
- Line 23: Contrary to standard WordPress featured image related functions get_the_np_thumbnal_url() and the_np_thumbnal_url() prints/returns URL to the file only. When parameter is not passed URL to uploaded (original, not cropped) image is returned.
- Lines 21,29,30,31 Functions used in these lines are network posts alterntives to WordPress functions. You can find list of all availabe functions bellow.
- Line 34: Function the_np_content() like WordPress the_content() method prints post content.
The rest of the code should be clear enough as it resembles any WordPress custom page template. Just in case you still finding it hard to follow or understand contact us with your questions or suggestions using contact form here.
Troubleshooting
I'm using custom page template with NP_Query to show recent network posts, but I only see blog posts from my main site.
There are several culprits why you could only see posts from your main site. First, you might skipped the initial caching or there is simply no pages or posts published in your network.
Second, WordPress Reading Settings could be "hijacking" your template to show main site news. Open Settings -> Reading page and make sure that when Front page displays set to A static page option, your Post page: is empty.
If this doesn't solve the issue you can try to send us message on Envato market for further assistance.
I'm creating custom tempalte with NP_Query but I'm missing xyx method to do it.
You can always request additional loop methods to be implemented in next plugin release.
Network Posts plugin caches a lot of data, so before contacting us you might want to try to execute the following code snippet to see what sort of information is already available for you:
<?php global $np_post; print_r($np_post); ?>
I would like to display only audio posts (posts with post format audio).
You can pass post_format argument to NP_Query.
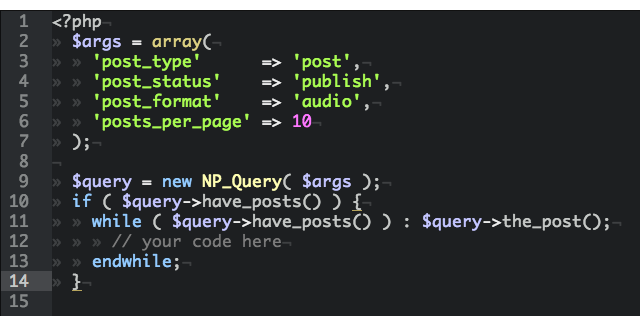
I would like to show posts only from specific blog(s), is it possible?
Yes. NP_Query accepts blog_ids parameter which could be used to display posts only from specific blogs. See code snippet below:
You can provide one or more Blog ID's. Please see this section if you have troubles locating Blog ID's.
List of functions available inside NP_Query loop:
- the_np_ID() Alternative to WordPress the_ID(), prints the post id.
- get_the_np_ID() Alternative to WordPress get_the_ID(), returns post id.
- the_np_permalink() Alternative to WordPress the_permalink(), prints the URL link to post on the network.
- get_the_np_permalink() Alternative to WordPress the_permalink(), returns URL link to post on the network.
- the_np_title() Alternative to WordPress the_title(), prints post's title.
- get_the_np_title() Alternative to WordPress the_title(), returns post's title.
- the_np_content( $more_link_text, $strip_teaser, $more, $the_content ) Alternative to WordPress the_content(), prints post's content.
- get_the_np_content( $more_link_text, $strip_teaser, $more ) Alternative to WordPress the_content(), returns post's content.
- the_np_date( $d ) Alternative to WordPress the_date(), prints post's date. Parameter $d could be used to pass date format, when empty default WordPress date format will be used.
- get_the_np_date( $d ) Alternative to WordPress get_the_date(), returns post's date. Parameter $d could be used to pass date format, when empty default WordPress date format will be used.
- the_np_author() Alternative to WordPress the_author(), prints post's author name.
- get_the_np_author() Similar to the_np_author(), instead of priting, returns post author's name.
- the_np_excerpt() Alternative to WordPress the_excerpt(), prints post's excerpt.
- get_the_np_excerpt() Alternative to WordPress the_excerpt(), returns post's excerpt.
- the_np_thumbnail_url( $size ) This function prints out url to the post thumbnail or original file when $size parameter is not specified. You can also use custom thumbnail size names (defined in Setting -> Network Posts as parameters for this function.
- get_the_np_thumbnail_url( $size ) This function returns url to the post thumbnail or original file when $size parameter is not specified. You can also use custom thumbnail size names (defined in Setting -> Network Posts as parameters for this function.
- get_np_post_meta( $post_id, $key, $single ) Alternative to WordPress get_post_meta(), only first parameter is required.
- get_np_post_format() Returns post format (aside, audio, gallery, chat, etc..) or an empty string when post format is not selected.
- get_np_blog_id() When used in the loop, returns blog id for current network post.
- np_reset_query() This function should be executed after all NP queries. It simply frees up memory by clearing up the variables.